How to enable ping in windows 10
Why pings are Blocked or disabled in windows?
If you have a firewall enabled in Windows, ping requests are blocked by default.
How to Allow Ping in Windows Firewall?
To configure your firewall to allow pings, follow the appropriate instructions below.
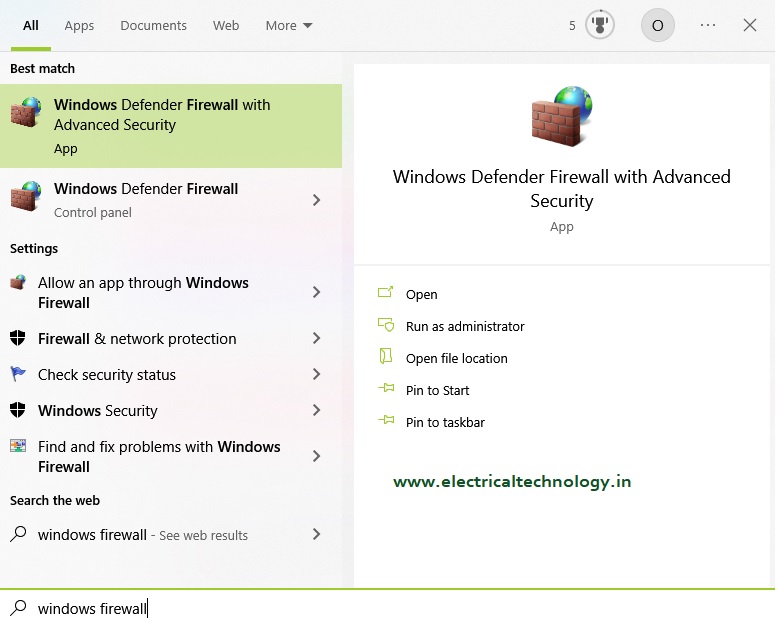
- Search for Windows Firewall, and click to open it.
- Click Advanced Settings on the left.
- From the left pane of the resulting window, click Inbound Rules.
- In the right pane, find the rules titled File and Printer Sharing (Echo Request – ICMPv4-In).
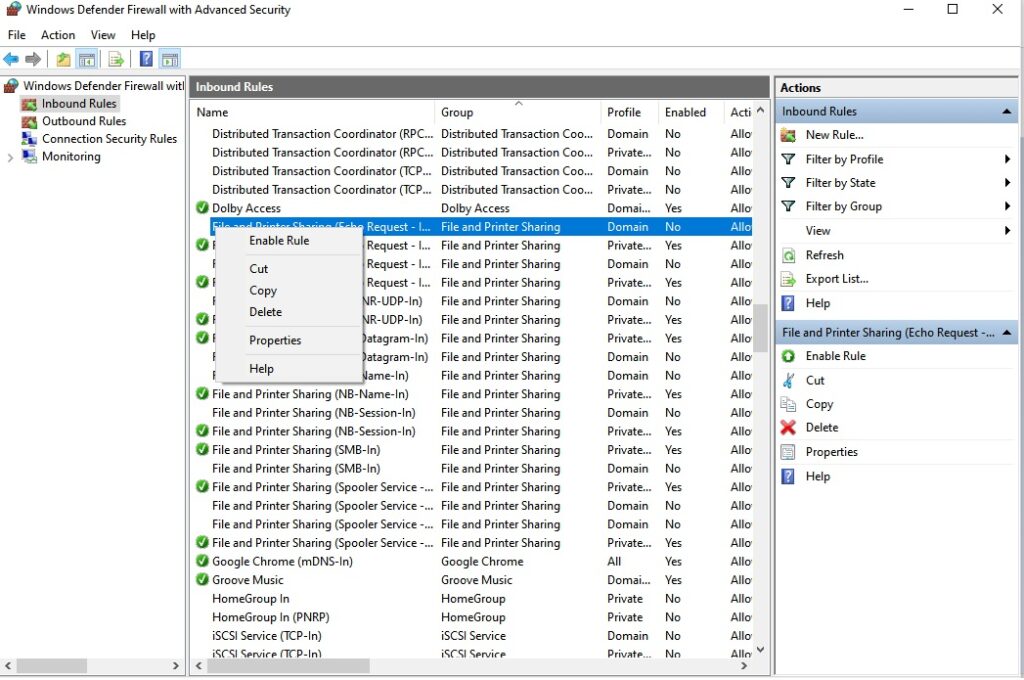
- Right-click each rule and choose Enable Rule
Allow Ping Requests in Windows 10
Step 1: Open the Windows Firewall
Click the start button then type firewall and click on “Windows Defender Firewall with Advanced Security”
Step 2: Click on Inbound Rules
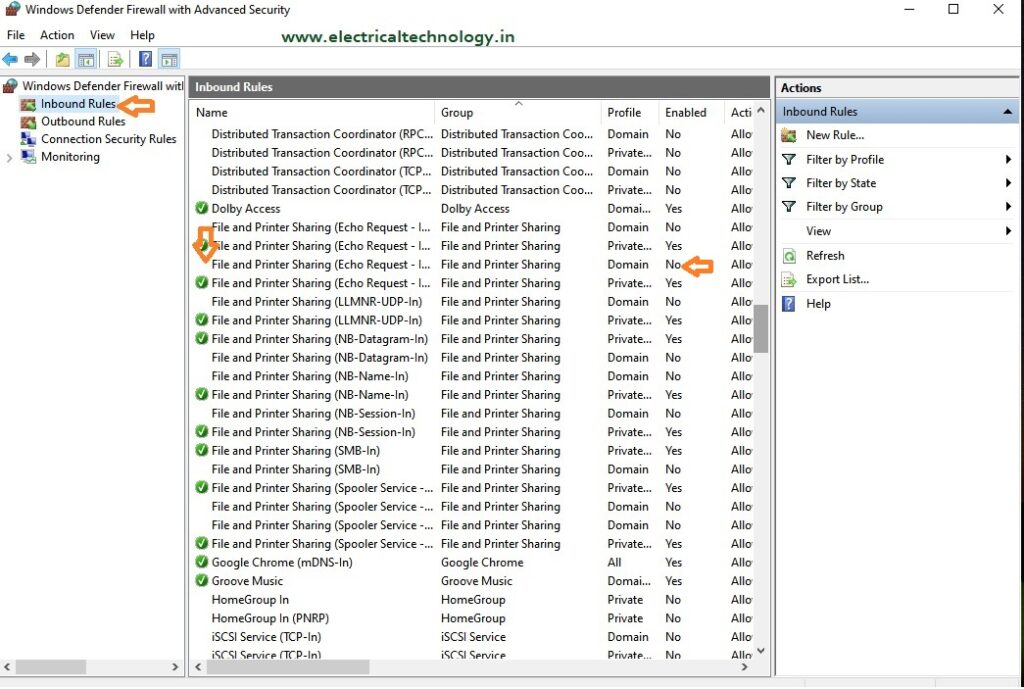
Step 3: In the inbound rule list scroll down to find the “File and Printer Sharing (Echo Request)
Find File and Printer Sharing (Echo Request – ICMPv4-In) Rule
Step 4: Right-click each rule and choose Enable Rule
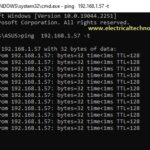
How do I ping in win10?
- For Windows 10, go to Search in the taskbar and:
- Type “cmd” to bring up the Command Prompt.
- Open the Command Prompt.
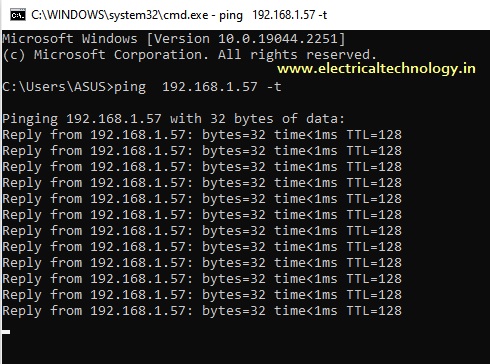
- Type “ping” in the black box and hit the space bar.
- Type the IP address you’d like to ping (e.g., 192. XXX. X.X).
- Review the ping results displayed.
Does Windows 10 block ping by default?
By default, Windows Firewall with Advanced Security blocks ICMP Echo Requests from the network.
How do I know if ICMP is enabled in Windows 10?
If ICMP is not enabled in Windows 10 the ping command wont work.
- How to enable telnet in windows 10
 What is the Telnet command in Windows 10? Telnet is a client-server protocol predating the TCP protocol. The network protocol allows a user to log into another computer within the same network through a TCP/IP connection Is telnet disabled on Windows 10? Telnet Client is not disabled in Windows 10. Telnet is a legacy protocol …
 - How to enable ping in windows 10
 How to enable ping in windows 10 Why pings are Blocked or disabled in windows? If you have a firewall enabled in Windows, ping requests are blocked by default. How to Allow Ping in Windows Firewall? To configure your firewall to allow pings, follow the appropriate instructions below. Allow Ping Requests in Windows 10 Step …
 - How to convert WebEx file to MP4?|Cisco WebEx meeting recording not processed complete
 You were conducting a online meeting in Cisco WebEx , with recording enabled. After the meeting finished , the recording should convert to MP4 file . But unfortunately some error happened and showed “we had a problem converting the recording to MP4 format” as shown below. Are you searching for a method to recover the …
Read moreHow to convert WebEx file to MP4?|Cisco WebEx meeting recording not processed complete